Showing posts with label knit. Show all posts

Thursday, October 14, 2010

Knit Jewelry - REDO

Oooo.... Aaaahhhh! Isn't it pretty? I am really pleased with my first attempt at knitting jewelry!

I ordered my beads first and then strung them onto the wire. I picked up some smaller sized needles and started knitting. I picked up a bead here and there and finished it off with a toggle clasp. It was a fairly quick knit but it is a little tough on the hands to use wire. I will definately be making more of these! I think some earrings might be nice too, just have to get the hooks for those.

***Ok, so my pics just won't show up directly in this post :-(  I'm linking to them instead, hope that works!***

http://picasaweb.google.com/lh/photo/3AxqPD7cfaZUUgrK1z-94n4CyFaFLY4KdNffHlMoXH4?feat=directlink
http://picasaweb.google.com/lh/photo/T918Y7ZN0ZZzytoYGqO1TH4CyFaFLY4KdNffHlMoXH4?feat=directlink
http://picasaweb.google.com/lh/photo/_PpqxlNK407tEZDDI805cn4CyFaFLY4KdNffHlMoXH4?feat=directlink

Monday, May 31, 2010

Reiana's Slipper Socks


We found the slipper socks! They were hiding with a box of books... They've been worn a bit so they're broken in looking, but I still love how the pattern on top turned out :-)
Posted by Picasa

Saturday, May 15, 2010

Hats

Recently fulfilled a couple of requested knits, both hats. The above pic is of a basketweave patterned hat requested by my son. He wanted something with a pattern but nothing too crazy. I didn't have the size 8 dpns called for so I used size 7. I didn't make any adjustments to the pattern otherwise though because it was meant for an adult and I was knitting for a kid. Plus the pattern indicated that it turned out pretty stretchy. It did feel like it was going to be too small, but I can actually fit it on my head, so it's just a snug knit.
I made the above hat for my sis after she saw the one I made for myself. Of course, I forgot to photograph mine! It's made with Lion Brand Homespun using a pattern made by Lion Brand just for this yarn.
Posted by Picasa

Recycled Knitting Pics

2 pairs of kids jeans cut into strips and knit into a scarf and then ends weaved together; worn by an adult above; worn by a girl below

Jean Scarf with better coloring above
Recycled pjs, knit into a light scarf, above
This is as far as several hours painstakingly unraveling a sweater has gotten me!

Blankets for boys


My boys wanted some warm blankets so let them pick out Lion Brand Homespun in their favorite color and I got to work. BTW, blankets take forever, even with this thicker yarn! I started the red one first and it took me about a month to finish. I did a simple seed stitch to play off the lumpy style of the yarn. I then did the green one and it took longer. I was back home by then and it was also started to warm up so I was short on inspiration. I still finished it in less than 2 months. This was done in a 2x2 rib, just for a different look. I cast on about 180 st for each blanket. I guesstimated that 4 skeins would be a nice blanket size so I just knit until those were used up. Turned out perfect, just around 4 feet long. They fit a kid just right, and could be a lap blanket for an adult.

Awesome Dishclothes


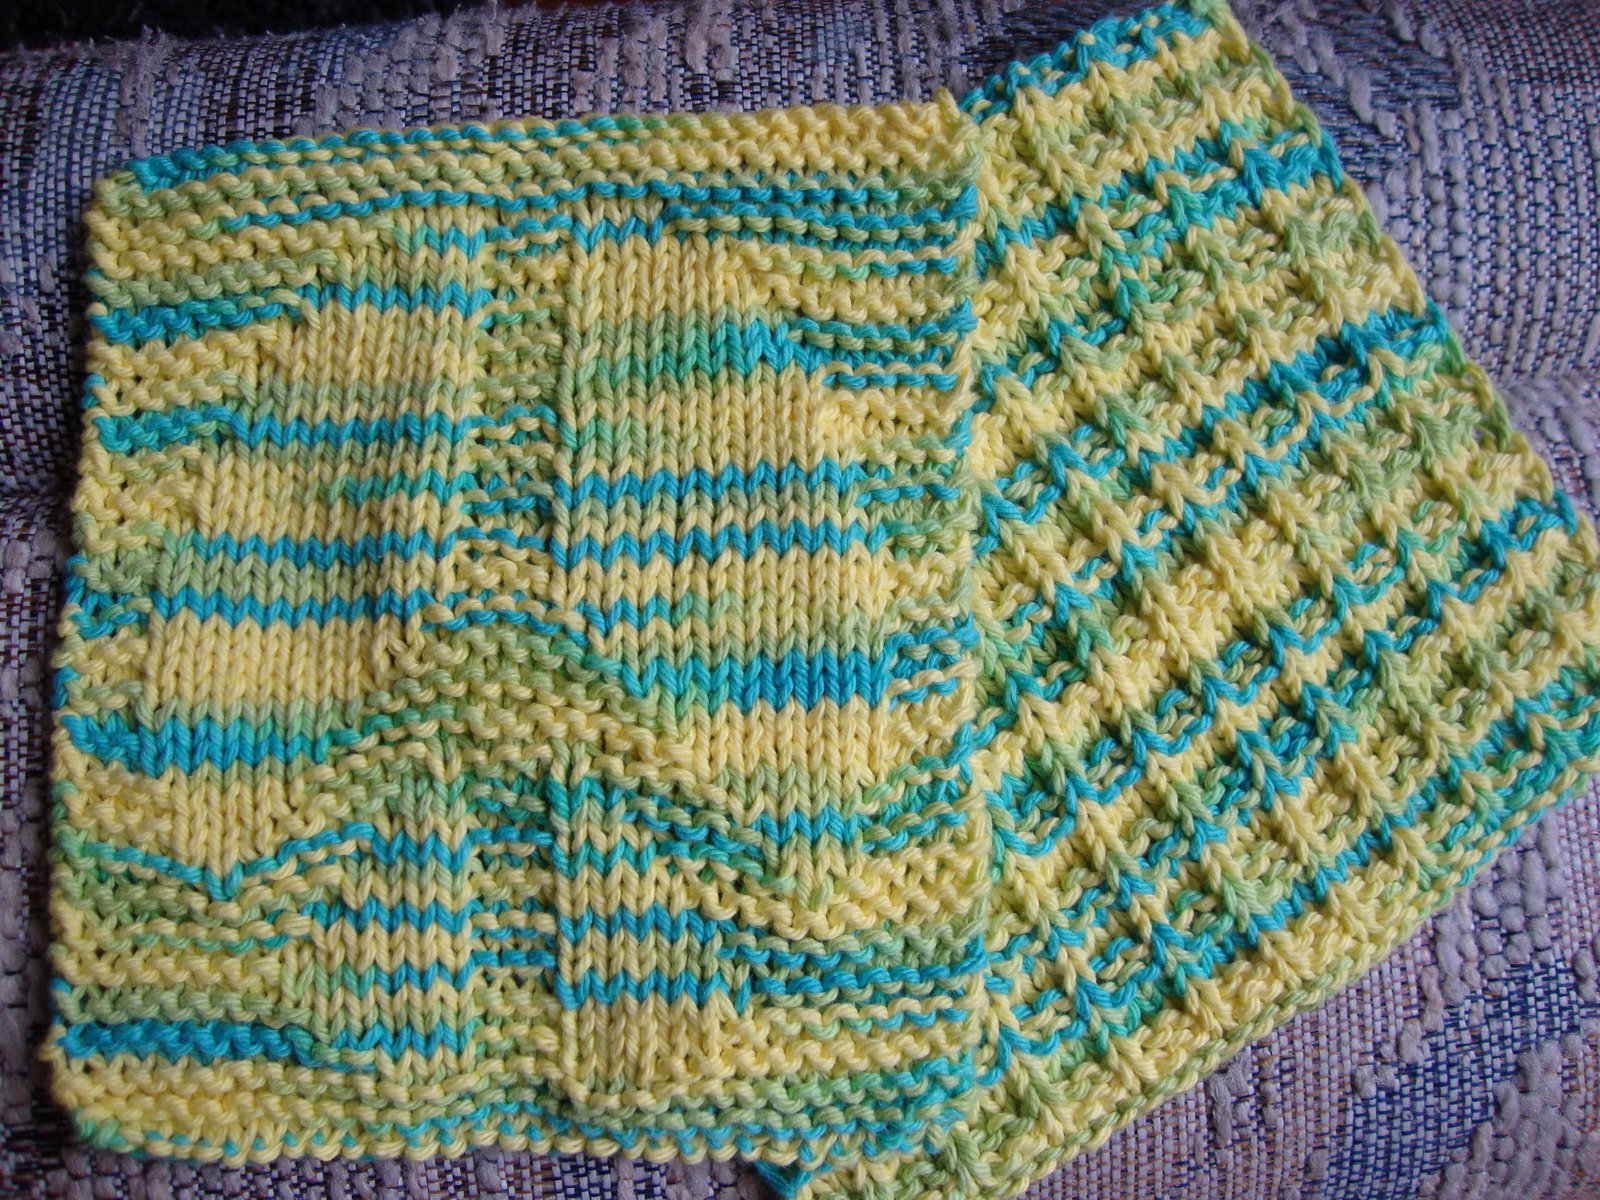
I bought a bunch of cotton yarn on sale and was looking for a quick project so I found some dishcloth patterns. I started out with the one on the right, called Double Bump. Then as I was searching and searching I came across the peace sign pattern. I thought it went well with the tie-dye-ish yarn colors so I cast on the Peace Washcloth. Both very easy wash/dish cloth patterns that look great in solid or patterned yarn. I even found a nice hippy to gift them too :-)
Posted by Picasa

Thursday, May 13, 2010

Recycled Knits

I've got kids that wear through clothes like it's going out of style... They get stained, holey and too small all the time. As I was sorting what winter clothes would get packed and which ones were done for I remembered an e-newsletter I gotten around Earth Day that talked about knitting with recycled materials. So, instead of trashing the worn out stuff, I decided to cut it up into strips and try knitting with it.

My first project was with two pairs of holey jeans. I wasn't sure what I was making, I just had a couple ideas in mind. I tried a couple different size needles and ended up having to use my size 50 needles because the jean was too thick for anything else. I was hoping to make a bag of some sort, but the jeans I had didn't go that far. I ended up with a longer cowl-ish, necklace-ish thing. Haha... I was thinking if I add some flashy embellishments it could fit in on Etsy. So, while not what I had in mind, it's certainly not a failure either.

Next I had a pair of PJs that were too small for my daughter. I was able to make a cute little lightweight scarf for her. She thought it was hilarious because she could have people touch what they thought was a scarf and then tell them it was her pjs :-)

So, after cutting and knitting a couple of items I learned some things about working with recycled materials. The most important is to cut out all the seams, pockets, and lumpy parts. I tried working with the seams on my first two and came across two problems. The first being that, especially with jean, it's just too lumpy. Secondly, with the pjs, the seams can become unraveled during knitting and leave you with a hole.

After I cut out all the lumpy parts I start cutting my strips. I try to make the longest continuous piece possible, using the "z" way of back and forth cutting. When I have all my strips I make a ball out of it, just putting ends of strips together, not knotting them together.

I've started on my first unraveling too. The yarn is pretty thin, it was quite difficult to find a starting point, and the process itself is very tedious. I'm not sure how many more unraveling's I'll be doing because my fingers are starting to hurt!


Wednesday, April 28, 2010

Slippers for DH


Yes, I know, pretty plain... these were made more for practicality than beauty. Just some basic slipper socks for about a size 11 mens.

Magic 8 CO 10(20) stitches
Knit 2 rounds
*kfb, knit to last st on first needle, kfb, kfb on second needle to the last st, kfb
Knit 1 round
Repeat from * until 26(52) st
Add 3rd needle to beginning of work, these first two needles will be the heel
Knit in the round for about 40 st or 5 inches
Begin heel:
Knit heel to last st, slip st, wrap, and move st back
Purl to last st, slip, wrap, and move st back
Knit to 2nd to last st, slip, wrap and move st back
Purl to 2nd to last st, slip, wrap and move st back
Continue to Knit (or Purl), slipping & wrapping until there are 6 st not wrapped
Knit across, pick up 1st wrapped st & knit, wrap the next already wrapped st and move st back
Purl across, pick up 1st wrapped st & purl, wrap the next already wrapped st and move st back
Continue to Knit (or Purl), picking up wrapped st, until all wrapped st are knit (or purl)
Wrap the first and last st on the needle not being worked
Begin knitting in the round again, picking up the wrapped st
Knit two more rounds
Begin 2x2 rib, knitting around for about 19 rows or 3 in
CO on row 20
Posted by Picasa

Tuesday, April 6, 2010

Girls slippers

Doing this as a copy and paste so hope it all translates correctly :-). Pics to follow...

fig 8 co 20
knit round 2 rows
add one by knitting into front & back of first stitch & last stitch of each needle
knit one round
add one to the first & last stitch on each needle
knit round
add one to the first & last stitch on each needle
knit round
add one to the first & last stitch on each needle (36 stitches)
knit round
add a needle to the heel section
r1-4: knit round
r5: knit heel, k2, yo, *k2tog, yo, repeat from *, end with k2 (19 stitches now on this needle)
r6: knit
r7: knit, on top needle k9, k2tog, k to end
r8: knit
r9-12: repeat r5-8
r13: knit heel, k2, c4b, repeat for top
r14: knit
r15: knit heel, c4b, k2, repeat for top
r16: knit
r17-18: repeat r13-14 except c4f
r19: knit heel, k4, *c4f, k2, repeat from *
r20: knit
r21-24: repeat r13-16
r25-32: repeat r5-8 twice
begin heel:
k heel to last stitch, slip stitch, wrap, and move back
purl to last stitch, slip & wrap, move back
knit across to 2 nd to last stitch, slip & wrap
purl across to 2 nd to last stitch, slip & wrap
continue slip & wrap until 5 on each side are wrapped
knit across, pick up 1 st wrapped stitch & knit, wrap already wrapped stitch
purl across to 1 st wrapped stitch, knit wrap & stitch, wrap already wrapped stitch
continue picking up wraps until all have been, wrapping the first & last stitch on the front needle

begin knitting around again, picking up the wrapped stitches
after 2 knit rows, continue knitting round in 2x2 rib until desired length (~3 inches)

Sunday, January 10, 2010

Windy City Twist... FInished


Finished this scarf for myself after taking a brief hiatis to do some christmas projects. Ended up liking the pattern and the way it worked out very much as the scarf took on some length.


Posted by Picasa

Fingerless Gloves to match...


After I made my Windy City Twist I still had some of the yarn left so I decided to work on some wrist warmers. I wanted to use the basic rib but also wanted to add in some interest with cables resembling a twist. I couldn't find a pattern was working for me, so I just got started with the rib. Then I decided to just start putting in cables and see how it worked out. It wasn't quite what I had in mind, but I like it and I made it up so that somehow makes it better :-) It was kind of complicated getting the cables to work on the left glove, but making it work backwards on the right glove was even more of a challenge. With that being said, here is my pattern:
BOTH GLOVES: CO 36 st on 7 dpns
k1, p1 in the round until ~4 1/2 inches
LEFT GLOVE
k1, p1, k16, *k1, p1, repeat from *; work this for three rows or ~ 5 inches
Begin the cable pattern
1) k1, p1, k2, c4b, k4, c4f, k2, *k1, p1, repeat from *
2) (begin knitting out of the round) (k1, p1)x8, k1, p16, k1, p1
3) k1, p1, k1, c4b, k6, c4f, k1, *k1, p1, repeat from *
4-6) even rows repeat row 2
5) k1, p1, k2, c4f, k4, c4b, k2, *k1, p1, repeat from *
7) k1, p1, k3, c4f, k2, c4b, k3, *k1, p1, repeat from *
8) (begin knitting in the round) k1, p1, k16, *k1, p1, repeat from *
9) k1, p1, k4, c4f, c4b, k4, *k1, p1, repeat from *
10-20) even rows repeat row 8
11) k1, p1, k4, c4b, c4f, k4, *k1, p1, repeat from *
13) k1, p1, k3, c4b, k2, c4f, k3, *k1, p1, repeat from *
15) repeat row 1
17) repeat row 3
19) k1, p1, c4b, k8, c4f, *k1, p1, repeat from *
21-22) repeat row 8
23) bind off
RIGHT GLOVE
(k1, p1) x9, k16, k1, p1; work this for three rows or ~ 5 inches
Begin the cable pattern
1) (k1, p1) x9, k2, c4b, k4, c4f, k3, p1
2) (begin knitting out of the round) k1, p17, (k1, p1) x9
3) (k1, p1) x9, k1, c4b, k6, c4f, k2, p1
4-6) even rows repeat row 2
5) (k1, p1) x9, k2, c4f, k4, c4b, k3, p1
7) (k1, p1) x9, k3, c4f, k2, c4b, k4, p1
8) (begin knitting in the round) (k1, p1) x9, k17, p1
9) (k1, p1) x9, k4, c4f, c4b, k5, p1
10-20) even rows repeat row 8
11) (k1, p1) x9, k4, c4b, c4f, k5, p1
13) (k1, p1) x9, k3, c4b, k2, c4f, k4, p1
15) repeat row 1
17) repeat row 3
19) (k1, p1) x9, c4b, k8, c4f, k1, p1
21-22) repeat row 8
23) bind off
Posted by Picasa

Monday, November 16, 2009

Sneaky Snake


Sneaky Snake is done and Jonathan is happy! He decided on adding the eyes and tongue and I think that makes it extra cute!

I think this yarn worked so great for this project... at some angles you don't notice the cables and some you do.
I improvised on the end of the pattern a bit so that both sides would match. After finishing row 24 of my last set of the pattern I followed the pattern backwards starting with row 9. Once I had cast off I found some black yarn and knotted two pieces on for eyes and a bit of pink yarn was knotted on for the tongue.
Posted by Picasa

Saturday, November 14, 2009

Sneaky Snake

Ooo-hoo... I'm working TWO projects at once! Look out! Haha... so I had this green unknown yarn and thought it looked #1 great for a boy, and #2 like it should be a creature. I decided on snake and went looking for a pattern. I found one that fit just right. As I started going, I wasn't sure this yarn would work because of all the texture in it. I've done two repeats and I'm starting to think it's just right. The extra texture is working with this and you can still see the snake, it's just not totally obvious... kind of like a real snake, could be hiding in the grass or something. I might even add a little pink tongue when it's finished!

Windy City Twist

Finally starting to twist, might work out well after all... This twisty scarf was not an easy start. I began using a pattern that worked the length of the scarf, but I didn't have large enough needles. I tried to compensate by doubling the cast on stitches and was at 800 stitches on the circ needles when they broke! I then had a knotted mess of yarn... I took two days to get started and another two to unknot the mess!

I'm now two days into this version knitting across... I was a little worried as I didn't see how this would start to twist, but I've gotten to a point where I'm seeing it now. I'm just hoping I can finish it in less than a week so I'll have it for my trip to the Windy City!

Sunday, October 25, 2009

Do Over!


So, the shawl I made with this yarn turned out rather unusable... I decided I liked the yarn enough to frog it and start on something I might actually use. I decided a wrap around my back would be nice, but something that would stay put and keep my arms warm as well. I just went from there in my mind.

CO 40 st on sz 10 dpns
K2, P2 in the round until the work is about 4 1/2 inches long (mid forearm to elbow)
K1, KFB, repeat all around, there are now 60 st
K work in the round until it is about 15 inches (mid forearm to shoulder)
Begin working "flat" (won't really be flat for many rows)*
  • R1: K
  • R2: P
At about 27 inches I was almost done with one skein of the yarn and the work was about mid-back so I stopped knitting, just leaving the work on the needle. I will be doing the 3 needle cast off with the other half once it's finished to seam the pieces together.

*For the first side, I swtiched to a circ when I stopped knitting in the round. That didn't work so well, so I tried straight needles, but they only started working once I was several rows out of the round. For the second side I plan to continue on the dpns until the straight needles will work.
Posted by Picasa

Pink Camo Wrist Warmers


Just trying to use up the pink camo yarn I had purchased to make socks with. I decided on wrist warmers thinking they'd be an easy knit. I read some patterns on ravelry.com to get sizing ideas and then cast on.

CO 36 st on sz 3 dpns
Work in the round: K2, P2 until work is 4 1/2 inches
Stop working in the round and continue K2, P2 for Row 1 and P2, K2 for Row 2 repeating twice (total of 4 rows not in the round)
Work back in the round K2, P2 until work is 7 inches long
BO

I found the easiest way to create a thumb hole was to just stop knitting in the round for a little, long enough to make the hole the right size.

As an FYI, these were knit for an 8 year old girl, so sizing may vary based on the recipient.
Posted by Picasa

Sunday, October 11, 2009

Bag O' Soap

CO 30 sz 7 dpns; K 4 rows; k2tog, yo, repeat; K 5 rows; K, yo, yo; k (drop yo's); K 4 rows; K, yo, yo; K (drop yo's); K 5 rows; 3 needle BO

Saturday, October 3, 2009

Stay-put Baby Blanket-Style 2


Another baby on the way in the extended family so I decided to try a different pattern on the blanket. I had plenty of the pastel green Pound of Love yarn so I got to work, casting on 80 again with size 7 dpns.

The first 8 rows are k1,p1 ribbing followed by increasing with row 9. k7, kfb, and repeat. Then the basketweave pattern begins.

R1-3: k5, p4, repeat ending on p4
R4: k
R5-7: p5, k4, repeat ending on k4
R8: k

I continued the basketweave pattern, ending on R8 of the pattern at row 102 or approximately 14 1/2 inches long. I went back to my first blanket pattern to end this one.

R103-107: k1, p1
R108: k7, k2tog, repeat to end
R109: k2tog, k38, repeat
R110: k6, k2tog, ending with k6
R111: knit
R112: k5, k2tog, ending with k6
R113: knit
R114: k4, k2tog
R115: knit
R116: k3, k2tog
R117: knit
R118: k2, k2tog
R119: knit
R120: k1, k2tog
R121: 3 needle bo

Saturday, September 19, 2009

Butterflly dishcloth


Finished this one up quick! I think it turned out pretty cool... I was a little worried about the pattern and the striping but it all landed in the right places. I found the pattern on ravelry and there is no website to link to so you need to be a ravelry member to view it.

I still have cotton yarn left so I'm trying to figure if there is enough to make another dishcloth. I did see a heart pattern I was interested in too, so maybe I'll try it and see...
Posted by Picasa

Friday, September 18, 2009

Scrubbie

So, I had yarn left from the first dishcloth I made and while searching for another dishcloth pattern I found this pattern for a "scrubbie". It only took a couple hours! I knit using the leftover Sugar'n Cream and some beige rough stuff I had leftover. That way there was a little extra scrubbing power in it!